Sunlight Readable 7 Segment Display: Designing for High Ambient Light
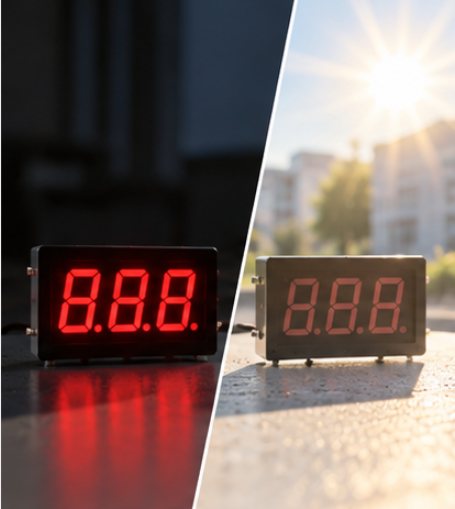
Quick Answer: Readability Is a Ratio, Not a Reading
Legibility depends on the ratio between the luminance of a lit segment and the luminance of the surrounding background under the same light. Raising segment output increases the numerator, but ambient light also raises the denominator, so brightness alone cannot be the whole answer.
The practical target is therefore a ratio measured at the worst condition the product will meet, not the highest number on a datasheet. A display specified from a dark-room reading will usually fail outdoors even when its peak output looks generous.
What High Ambient Light Actually Does to the Reading
Light arrives at the display from every direction, and the parts that matter are the ones that reach the eye from the same surface the digits are on.
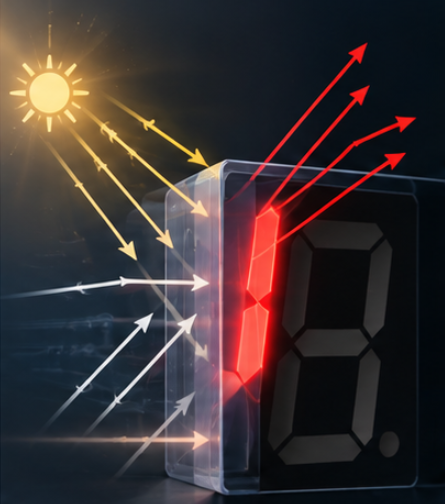
Ambient light hits the display twice
The front surface reflects light directly back towards the viewer, and the areas that are switched off inside the digit also reflect whatever passes through the window. Both reflections add luminance exactly where the eye is trying to distinguish on from off.
Then the eye adapts to the average
The eye adjusts to the overall brightness of the scene, so a display in a bright environment is judged against a higher baseline. This is why a display that is perfectly adequate indoors can appear washed out outdoors at the same drive setting.
The same reasoning applies whenever a display must be read next to a bright surface or through a contaminated window. In those installations the limiting factor is rarely the emitter and usually the optical stack around it, a point also visible in controller panel displays where the panel is read across a room.
The Four Levers That Raise Contrast
Four decisions set the ratio, and each one carries a trade-off that has to be accepted somewhere else in the design.
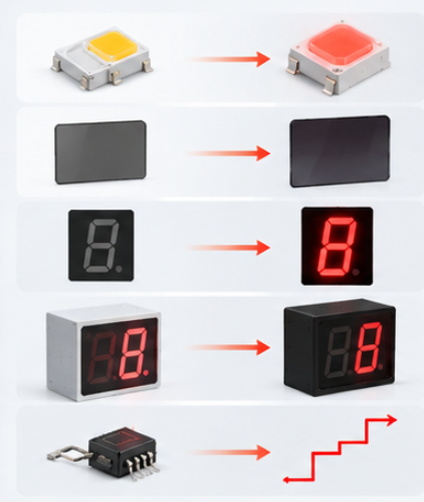
| Lever | What it changes | Trade-off to manage |
|---|---|---|
| Segment output intensity | Raises the luminance of the lit part of the digit | Higher drive current raises junction temperature and shifts colour |
| Window tint and filter | Reduces the ambient light reaching the eye without cutting emitted light as much | Lower overall transmission makes the display dimmer at night |
| Aperture and background colour | Changes how much reflective area sits beside each segment | A darker background improves contrast but reduces the lit area |
| Viewing geometry | Keeps the reading inside the angle where contrast is highest | Constrains the mechanical design of the panel and bezel |
Two of these levers are optical and two are mechanical, which is why the decision cannot be left to the component supplier alone. The person who owns the front panel has to be involved before the sample is approved.
Choosing the Window: Tint, Filter and Aperture
The window is the most efficient place to spend design effort, because it acts on the unwanted light before it reaches the eye. A lightly tinted or filtered window reduces reflection from the display surface while leaving the emitted light mostly intact, provided the transmission is matched to the colour being emitted.
Aperture matters in the same direction. A segment that occupies a larger share of the digit area produces a larger lit region, but the surrounding background is what reflects ambient light back to the viewer, so a darker background around the same segment raises the ratio without any additional drive current.
Colour choice interacts with both. Red and amber emitters usually deliver the highest output for a given drive current, while blue and white emitters of the same visual size will typically need more current to reach the same ratio. The measurement vocabulary for those comparisons is set out in our explanation of LED display brightness in mcd.
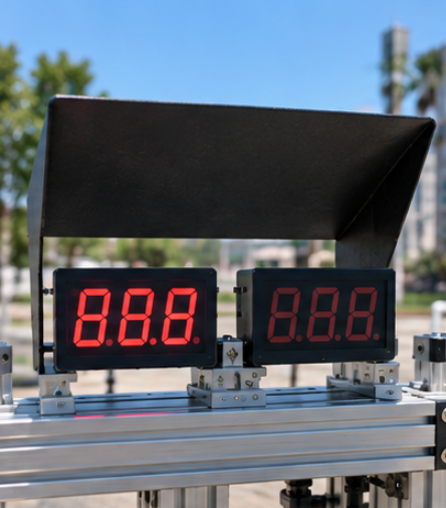
Where the panel can be reshaped, a recessed or hooded bezel is often more effective than any change to the emitter, because it removes the direct path between the sun and the display surface.
Driving Brighter Without Cooking the Display
Increasing drive current is the fastest way to raise the numerator, and it is also the fastest way to create a reliability problem. Output falls as junction temperature rises, so a display driven hard in an enclosure that cannot remove the heat will lose part of the gain it was given.
The safe sequence is to exhaust the optical options first and use drive current as the final trim. Once the window, background and aperture have been chosen, a modest increase in current usually reaches the target ratio, and the thermal margin left over can be verified against the same methods described in thermal limits in LED displays. Duty cycle matters here as well, because a multiplexed display delivers current in short pulses and the apparent brightness depends on the average rather than the peak.
One further constraint is supply headroom. A 7 segment display for a digital meter often runs from a low-voltage rail, so the current available for the display competes with the rest of the instrument. Choosing a higher-efficiency colour is sometimes a better answer than asking for more current that the supply cannot provide.
Validating Readability Before Production
Readability is validated in the condition the product will actually meet, not in a lab. The essential elements are the production window, the production drive condition, the real viewing distance and an ambient light source strong enough to represent the worst case.
- Fix the comparison: same distance, same angle, same camera exposure and same background for every sample.
- Record the result at the brightest condition and at the dimmest condition, because a display tuned only for sunlight can become uncomfortable at night.
- Repeat at the extremes of the viewing angle, since contrast falls off faster than on-axis output.
- Repeat with a fingerprint or a light film of dust on the window, which is the state the product will spend most of its life in.
Photographic comparison under fixed exposure is the cheapest useful record, because it preserves the relative difference between samples in a way that a single luminance reading does not. Where the numbers matter for a specification, pair the photographs with a measured ratio at the agreed condition.
Sample validation is also the point at which the mechanical and optical decisions meet. A candidate approved on a bench under a shop light should not be released on that evidence alone, particularly for a 7 segment LED display that will be read outdoors or beside a bright window.
Frequently Asked Questions
How to evaluate sunlight readable 7 segment display for an OEM design?
Evaluate it as a contrast ratio between a lit segment and the segment-off background under the brightest light the product will meet. Then confirm that the ratio still holds at the worst viewing angle and with a contaminated window.
Which parameters matter most for sunlight readable 7 segment display?
Segment output intensity, the transmission and tint of the front window and the reflective area around each segment matter most. Reflection from the window itself is usually the largest single contributor to washout.
How does sunlight readable 7 segment display affect LED performance?
Driving brighter raises junction temperature and shifts colour, so readability bought with current alone reduces the usable life of the part. A better optic and a darker background raise contrast without pushing the junction further.
How should engineers validate sunlight readable 7 segment display before production?
Validate with the production window and the production drive condition, outdoors or in an equivalent high ambient setup, at the real viewing distance. Record the comparison photographically under fixed exposure so the result can be repeated by someone else.
Is a brighter display always more readable?
Not always, because the eye adapts to the average brightness of the scene and excessive output at night becomes glare. The design target is the contrast ratio at the worst condition, not the highest reading on a datasheet.
Conclusion: Specifying Readability as a Number
A sunlight readable 7 segment display is not produced by a single component choice. It comes from deciding the worst condition first, then working through the window, the aperture, the colour and finally the drive current in that order, and from testing the result under the real light rather than under a bench lamp.
Written that way, readability becomes part of 7 segment LED design and multi-digit LED display design rather than an afterthought at the panel, and it becomes something Display Optical Performance can be reviewed against. The verification record from one programme then shortens the next one, because the contrast target and the window treatment are already agreed.
If you are designing a panel that has to stay readable in daylight and want the optical stack and drive condition agreed before tooling, send the ambient light condition and viewing distance through the inquiry page.
Large 7 Segment Display Driver Circuit: Driving Higher Segment Voltage