


How to Test an IR LED: 5 Easy Methods
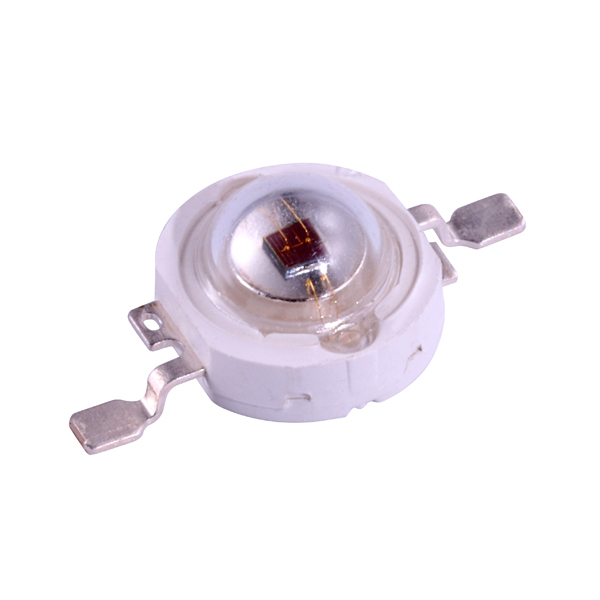
If you want to quickly test an IR LED, the easiest method is using a smartphone camera. Because infrared light is invisible to human eyes, a phone camera can often detect infrared light and display it as a white, purple, or bluish glow on the screen.
For more accurate results, you can also test an IR LED with a multimeter, an infrared detector, or by checking voltage and circuit performance.
This guide explains several practical ways to determine whether an infrared LED is working and how to troubleshoot common issues.
Quick answer: The easiest way to test an IR LED is to point it at a smartphone camera while powering it correctly. If the camera detects a white, purple, or bluish glow, the IR LED is likely emitting near-infrared light. For a more reliable check, use a multimeter to verify forward voltage and polarity, then compare the result with the manufacturer's datasheet.
Why Infrared LEDs Are Difficult to Test
IR LED (Infrared Light Emitting Diode) emits light outside the visible spectrum, with 850nm and 940nm IR LEDs being among the most common wavelengths used in practical applications.
Unlike standard LEDs, infrared light cannot usually be seen directly by human eyes. An IR LED may appear completely dark even when operating normally. Whether an IR LED appears visible to a camera also depends on its wavelength, output power, the camera's IR filtering, and the testing distance.
That is why additional testing methods are required.

How to Test IR LED with a Smartphone Camera
This is the easiest and most commonly used testing method.
Why it works
Most smartphone cameras and digital image sensors retain partial sensitivity to infrared light. Although many phones include IR-cut filters, near-infrared wavelengths can still be detected.
Steps
- Open your smartphone camera application
- Point the IR LED directly toward the camera lens
- Power the IR LED or activate the device
- Observe the phone display
How to Interpret the Result
- No visible glow: Check the power supply, polarity, camera compatibility, and LED condition.
- Weak glow: Check the drive current, testing distance, and whether the phone has a strong IR-cut filter.
- Flashing glow: The LED may be operating with a pulsed signal, such as in a remote control.
Some newer phones have stronger infrared filtering and may show weaker results.
Which IR LED Testing Method Should You Use?
| Method | Equipment | What It Checks | Best For |
|---|---|---|---|
| Smartphone camera | Smartphone | Visible IR emission | Quick test |
| Multimeter | Multimeter | Electrical conduction | Component check |
| Voltage/current test | Multimeter or power supply | Drive conditions | Circuit testing |
| IR detector | IR detector/photodiode | IR response | Accurate detection |
| Application test | Complete system | Real-world operation | System troubleshooting |
How to Test IR LED with a Multimeter
Many users search for how to test IR LED with multimeter because it provides a quick electrical check.
Step 1: Use diode mode
Set the multimeter to diode mode. For a general reference on diode testing, you can also see Fluke’s guide to testing diodes with a digital multimeter.
Connect:
- Red probe → anode (+)
- Black probe → cathode (−)
If the IR LED is functioning, you may see:
- Forward voltage reading
- Small voltage drop
- Weak camera-visible light
Typical IR LED forward voltage
| IR LED Type | Typical Forward Voltage* |
|---|---|
| Standard low-power IR LED | About 1.1–1.7V |
| 850nm IR LED | Often around 1.2–1.7V |
| 940nm IR LED | Often around 1.1–1.6V |
| High-power IR LED | Depends strongly on chip and drive configuration |
These values are general reference ranges, not universal specifications. Forward voltage varies with wavelength, chip design, package, forward current, and power rating. Always use the manufacturer's datasheet as the final reference. If you are not familiar with parameters such as forward voltage, wavelength, radiant intensity, or beam angle, see our guide on how to read LED specifications.
If measured voltage is significantly outside these ranges, the IR LED or drive circuit may be damaged.
| Multimeter Result | What It May Mean |
|---|---|
| Forward voltage detected | LED junction is conducting |
| OL / open circuit | Reversed probes or damaged/open LED |
| Very low voltage | Possible short circuit or measurement issue |
| Normal voltage but no optical output | Possible LED damage or insufficient drive conditions |
Important note
A multimeter confirms electrical conduction but cannot fully prove infrared light output.
For best accuracy, combine this method with the smartphone camera test.
How to Check IR LED Polarity
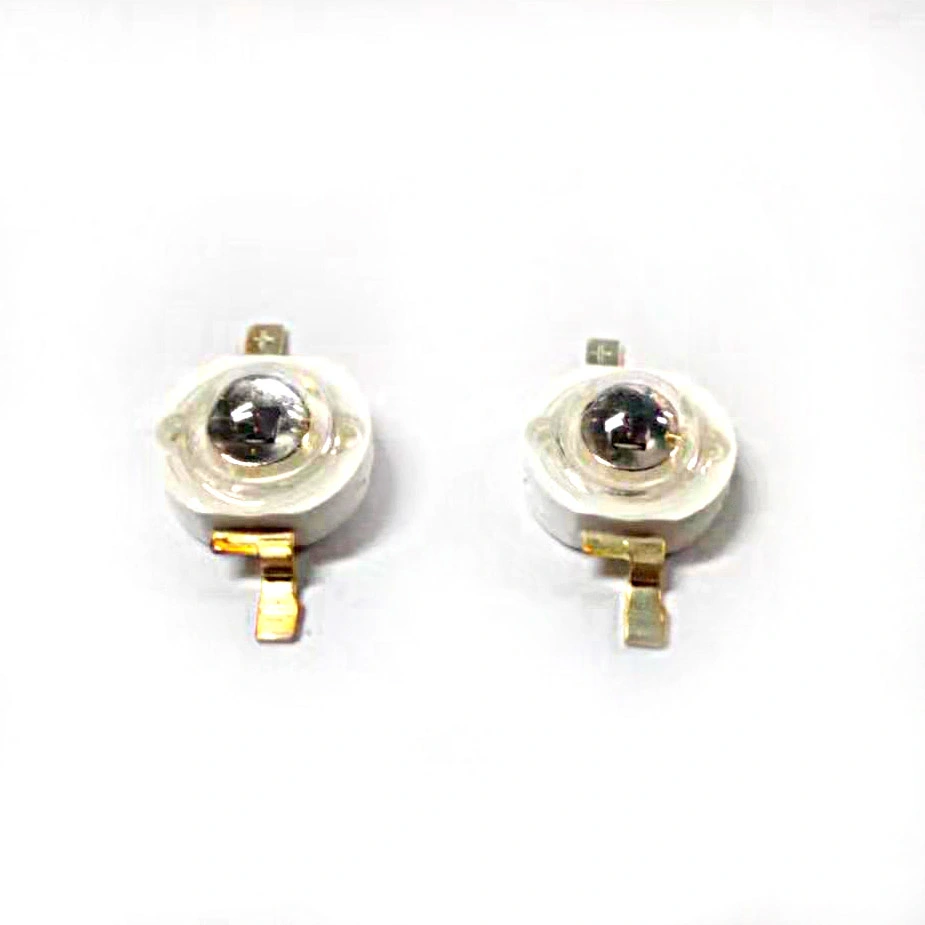
An IR LED is a polarized component, so it must be connected in the correct direction to work properly. You can check IR LED polarity by referring to the manufacturer's datasheet, package markings, PCB symbols, or LED leads.
For a multimeter test, set the meter to diode mode. Connect the red probe to the suspected anode (+) and the black probe to the cathode (−). A forward-voltage reading indicates that the LED is conducting in that direction. If no reading appears, reverse the probes and test again.
Because package markings can vary, always use the manufacturer's datasheet as the final reference for IR LED polarity.
How to Detect Infrared Light
The easiest way to detect infrared light is with a smartphone camera. Point the IR LED toward the camera while it is powered correctly. If the camera can detect the wavelength, the infrared LED may appear as a white, purple, or bluish glow.
For more reliable infrared light testing, use an IR detector, photodiode, or IR receiver module. These devices can provide a measurable response and are more suitable for engineering applications.
Keep in mind that a smartphone camera can confirm the presence of infrared light, but it cannot accurately measure optical output or IR intensity.
Using an Infrared Detector or Photodiode
For engineering applications or production testing, dedicated infrared detectors provide more accurate measurement. For more information on infrared detector technologies, refer to Hamamatsu’s infrared detector resources.
Common detector types:
- IR photodiodes
- Photoresistors
- IR receiving modules
- Commercial infrared detectors
When infrared light is present, the detector produces a measurable response:
- voltage change
- resistance change
- signal output
- indicator activation
Advantages:
✔ Higher accuracy
✔ Quantitative testing
✔ Suitable for production environments
Disadvantages:
✘ Additional equipment required
Testing Through Application Function
In many systems, infrared LEDs can be verified through actual operation. An IR LED is an infrared emitter, while an IR sensor or receiver detects infrared radiation. If you need a deeper explanation of the receiver side, see how infrared sensors work in active IR and PIR systems. When troubleshooting a complete IR system, test the emitter and receiver separately before evaluating the entire circuit.
Examples:
Remote controls
Point the remote emitter toward a smartphone camera while pressing buttons.
A flashing white or purple light indicates operation.
IR beam sensor systems
Break the infrared beam and verify whether receiver output changes.
Security camera illuminators
Test the camera in a dark environment and confirm night vision activation.
Functional verification often provides fast confirmation without special tools.
IR LED Troubleshooting: Why Is It Not Working?
If an IR LED is not working, check the power supply, polarity, connections, and drive conditions before replacing the component.
Power or connection issue
Check for:
- Low or unstable voltage
- Loose wires
- Broken solder joints
- Damaged connectors
Reverse polarity
IR LEDs are polarized devices. Incorrect orientation can prevent the LED from operating. Check the anode and cathode against the manufacturer's datasheet.
Resistor or drive issue
A missing or incorrect current-limiting resistor can cause insufficient or excessive current. Excessive current may permanently damage the LED.
LED damage
Possible causes include:
- Overcurrent
- Overheating
- ESD
- Excessive reverse voltage
- Physical damage
If the LED has the correct polarity and electrical input but produces no detectable infrared output, test it with a suitable IR detector and compare the results with the manufacturer's specifications.
Quick IR LED Testing Checklist
✔ Use smartphone camera first
✔ Verify polarity direction
✔ Measure voltage
✔ Test using multimeter diode mode
✔ Check resistors and solder joints
✔ Confirm sufficient current supply
✔ Test actual application function
Safety Notes When Testing IR LEDs
Although infrared light is invisible, high-power IR LEDs can still create eye safety risks.
Always avoid:
- staring directly into active IR LEDs
- close-range exposure
- operating high-power emitters without protection
For industrial systems, follow IEC 62471 photobiological safety recommendations.
Do not assume that an invisible IR LED is harmless simply because you cannot see the emitted light.
FAQ
How do I know if my IR LED is working?
Point the IR LED toward your smartphone camera. A working infrared LED usually appears as a white or purple light source on the screen.
Can a multimeter test an IR LED?
Yes. Diode mode on a multimeter can indicate whether current flows through the IR LED, although it cannot fully verify infrared output.
What voltage should an IR LED have?
Most IR LEDs operate between approximately 1.1V and 1.7V depending on wavelength and current.
Why can't I see infrared light?
Infrared light exists outside the visible spectrum and cannot be detected by human eyes.
Can IR LED fail even if voltage exists?
Yes. Internal damage may allow current flow while preventing infrared light emission.
How do I test an IR LED without a multimeter?
Point the powered IR LED toward a smartphone camera. If the camera detects infrared light, the LED may appear as a white, purple, or bluish glow. If nothing appears, try another phone because some cameras have stronger IR filters.
Why does my IR LED show voltage but no light?
Voltage alone does not confirm that an IR LED is producing infrared output. Check the polarity, forward current, and drive conditions. Also try another camera or an IR detector, as some cameras cannot detect certain infrared wavelengths effectively.
How do I test a 940nm IR LED?
Use a smartphone camera for a quick check, then use a multimeter to verify polarity and forward voltage. For more reliable testing, use an IR detector and compare the LED's operating conditions with the manufacturer's datasheet.
Conclusion
Testing an IR LED can be as simple as using a smartphone camera, while a multimeter and IR detector provide more reliable results. Checking polarity, voltage, current, and circuit connections can help identify common IR LED troubleshooting issues.
For engineering and OEM applications, always compare test results with the manufacturer's datasheet to ensure the correct wavelength and operating conditions.
Need help selecting the right IR LED for your application? Contact Houkem for datasheets, samples, wavelength recommendations, and OEM/ODM solutions.
IR LED Applications and Industrial Uses
UV LED vs Black Light: 365nm vs 395nm, Differences, Wavelengths & Applications


