LED Incoming Inspection: A Practical Checklist for OEM Buyers

A shipment can arrive with the correct quantity and still be unsuitable for production.
The wrong wavelength bin, a slightly different package dimension, mixed production lots, damaged reels, inconsistent brightness, or an out-of-range forward voltage may not be obvious until the LEDs reach assembly. By then, the cost of the problem is usually much higher.
A practical LED incoming inspection should therefore answer one question before the parts are released to production:
Does this shipment match the product that was actually approved?
For most OEM buyers, that means checking product identity, packaging, appearance, electrical and optical performance, dimensions, traceability, and the agreed acceptance criteria. The exact depth of inspection should depend on the LED type, application risk, order size, and supplier history.
What Is LED Incoming Inspection?
LED incoming inspection is the inspection performed after LED components arrive at the buyer's facility but before they are released to production.
It is usually part of Incoming Quality Control, or IQC.
Supplier outgoing inspection and buyer incoming inspection are related, but they are not the same thing. A supplier may have tested the components before shipment, while the buyer still needs to confirm that the correct batch arrived in acceptable condition and matches the approved specification.
Incoming inspection can identify problems such as:
- wrong part numbers or product variants;
- mixed production lots;
- damaged reels, trays, tubes, or packaging;
- incorrect labels or polarity markings;
- electrical parameters outside the approved range;
- wavelength or brightness variation;
- dimensional problems;
- missing lot traceability.
The inspection does not need to be unnecessarily complicated. It needs to be appropriate for the risk of the application.
An indicator LED for a simple control panel may require a different inspection plan from a UV LED used in a curing machine or a custom LED display designed around a fixed PCB footprint.

Start With the Shipment, Not the Test Equipment
Before opening bags or powering any LEDs, verify that the shipment itself is correct.
Compare the received goods with the purchase order and approved product records.
At minimum, check:
- supplier name;
- purchase order number;
- part number;
- quantity;
- lot or batch number;
- date code where applicable;
- reel, tray, tube, or bag labels;
- ESD packaging;
- moisture protection where required;
- visible shipping damage.
This step is easy to skip because it feels administrative rather than technical. In practice, it can prevent some of the most disruptive production mistakes.
If the part number is wrong, there is little value in spending time measuring forward voltage.
A useful rule for incoming inspection is:
Confirm the component's identity before confirming its performance.
Compare the Batch With the Approved Specification
The inspection team needs a clear reference before deciding whether a component passes or fails.
Depending on the project, that reference may include:
- the approved datasheet;
- an engineering drawing;
- the purchase specification;
- a supplier specification sheet;
- an approved pre-production sample;
- a golden sample.
For an LED, the approved requirements may cover parameters such as:
- package type;
- dimensions;
- forward voltage;
- rated or test current;
- wavelength;
- color;
- luminous intensity;
- radiant power;
- polarity;
- pin configuration.
The key word here is approved.
A supplier's current catalog page should not automatically replace the version that was agreed when the project was approved. If a wavelength range, dimension, pin layout, or brightness bin was specified for your project, incoming inspection should be based on that requirement.
Where a Golden Sample Helps
A golden sample is particularly useful for customized LED displays and other products where visual characteristics matter.
It can give the quality team a physical reference for:
- display color;
- segment appearance;
- brightness balance;
- package finish;
- markings;
- overall construction.
However, a golden sample should support the written specification rather than replace it.
“Looks similar to the sample” is not a reliable acceptance criterion for dimensions, voltage, wavelength, or other measurable characteristics.
Perform a Visual and Packaging Inspection
Visual inspection is usually the quickest part of an LED inspection checklist, but it can reveal more than cosmetic problems.
Depending on the LED type, look for:
- cracked resin or packages;
- scratched or damaged lenses;
- contamination;
- discoloration;
- bent leads;
- oxidation;
- damaged soldering surfaces;
- inconsistent markings;
- incorrect polarity marks.
For SMD LEDs, check reel condition, orientation, tape damage, and packaging integrity.
For through-hole LEDs, lead straightness, lead spacing, and oxidation may be more relevant.
For LED displays, inspect the housing, pins, segment area, printed markings, and overall appearance.
Not every cosmetic issue is a functional defect. But visible damage can be an early warning of poor handling, packaging, or process control.
A damaged optical surface, for example, may affect light distribution even if the LED still turns on.
Decide How Much of the Batch to Inspect
Testing every LED in every shipment is rarely practical.
The sample size should reflect the risk of the component and the confidence you already have in the supplier.
Factors may include:
- lot size;
- application criticality;
- previous defect history;
- supplier performance;
- component value;
- cost of assembly failure;
- customer quality requirements.
For established production orders, buyers often use an agreed sampling plan rather than 100% inspection.

How AQL Fits Into LED Incoming Inspection
AQL, or Acceptable Quality Limit, is commonly used to support sampling decisions.
In practical terms, it helps define:
How many units should be inspected, and how many defects can be found before the lot requires further action?
AQL should not be treated as one fixed number for every LED order.
A low-cost visual indicator and a high-power UV LED used in a production process do not carry the same risk. Inspection levels and acceptance criteria should reflect how the component will actually be used.
Defects may also be separated into categories such as critical, major, and minor.
For example, an incorrect electrical specification may be treated very differently from a small non-functional cosmetic mark.
The important part is to agree on the defect definitions and acceptance rules before there is a dispute.
Check the Electrical Parameters
Once identity and appearance have been confirmed, electrical testing can begin.
The exact tests depend on the LED, but several parameters are commonly checked.
Forward Voltage
Forward voltage, or Vf, should be measured at the agreed test current.
This detail matters.
A forward-voltage reading has little meaning if the incoming batch is tested under different conditions from the approved specification.
If the approved LED has a defined Vf range at a specific current, the received samples should be compared under that same condition.
Polarity
Check the anode and cathode against the drawing or approved sample.
Polarity mistakes are particularly disruptive with:
- SMD LEDs;
- customized packages;
- 7-segment displays;
- dot-matrix displays;
- assemblies with non-standard pin layouts.
A polarity error may not be discovered until assembly if the incoming inspection only checks appearance.
Reverse Leakage
Reverse leakage is not a routine requirement for every LED project, but it may be included when the electrical specification or application makes it relevant.
The wider principle is more important:
LED electrical testing should reproduce the conditions used to define the approved limits.
Check Optical Performance, Not Just Whether the LED Lights
One of the biggest weaknesses in basic LED quality inspection is using “lights up normally” as the final acceptance test.
An LED can illuminate and still be outside specification.
Depending on the product, optical inspection may include:
- luminous intensity;
- luminous flux;
- color coordinates;
- dominant wavelength;
- peak wavelength;
- radiant intensity;
- radiant power;
- sample-to-sample output consistency.
The correct parameter depends on the LED's function.
Visible indication, UV curing, IR sensing, and digital displays do not require the same optical test.
Incoming Inspection for UV LEDs
For UV LEDs, whether the component visibly turns on tells you very little.
The important parameters may include:
- wavelength range;
- radiant power;
- output consistency;
- forward voltage;
- package condition;
- lot identification.
This is particularly important in applications such as UV curing, printing, adhesive curing, fluorescence inspection, and industrial irradiation.
A UV LED can pass a basic electrical check and still fail the application because its wavelength or radiant output is outside the required range.
For a curing process, that difference can directly affect the reaction of the ink, coating, resin, or adhesive.
Incoming Inspection for IR LEDs
IR LEDs create a similar problem: the output cannot be assessed reliably by the human eye.
Depending on the application, an LED optical inspection for IR components may check:
- peak wavelength;
- radiant intensity;
- forward voltage;
- output consistency.
Suitable IR-sensitive cameras, detectors, optical meters, or spectrometers can be used depending on the accuracy required.
For machine vision, sensing, security illumination, and optical detection, “the LED is electrically working” is not the same as “the LED meets the required optical specification.”
Incoming Inspection for LED Displays
7-segment displays, dot-matrix displays, and customized LED displays require a slightly different checklist.
Useful checks include:
- all segments or dots functioning;
- missing or weak segments;
- brightness uniformity;
- color consistency;
- polarity;
- common-anode or common-cathode configuration;
- pin layout;
- housing dimensions;
- lead spacing;
- markings.
Do not rely on a single functional sample for a large production lot.
One display lighting correctly does not tell you whether the batch has consistent segment brightness or whether dimensional variation will create PCB assembly problems.
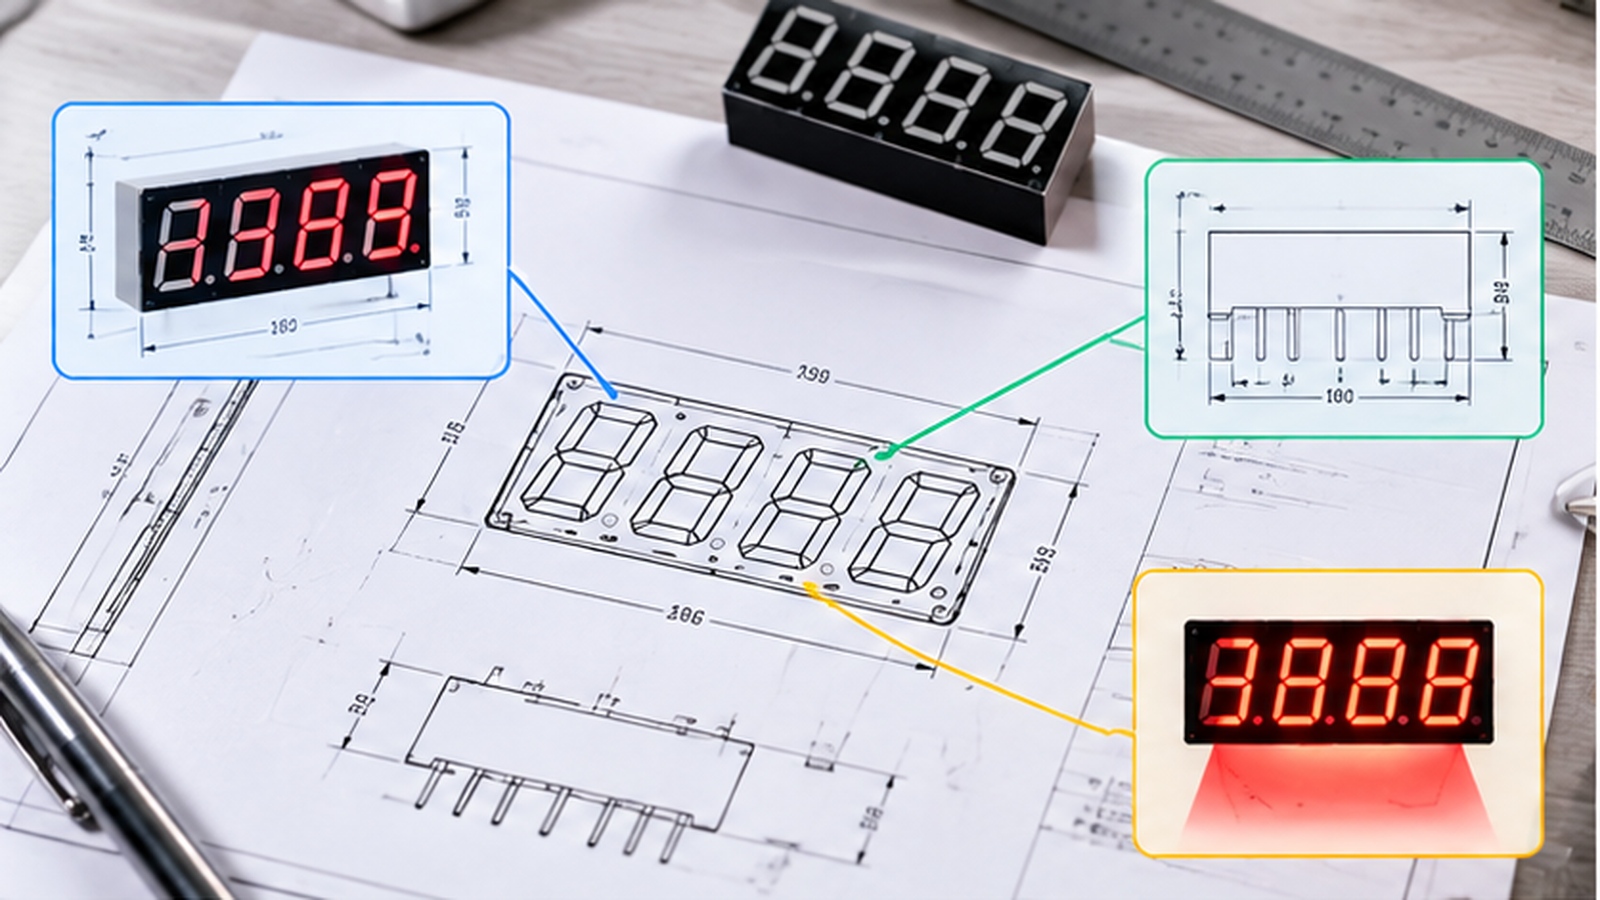
For custom displays, the approved drawing and golden sample should both be available during incoming inspection.

Check Mechanical Dimensions Before Production Finds the Problem
Not every LED quality issue is electrical.
A component can meet its Vf and brightness requirements and still be unusable because it does not fit the PCB or enclosure correctly.
Depending on the product, verify:
- package width and height;
- lead length;
- pin pitch;
- lens height;
- PCB footprint compatibility;
- pin position;
- mechanical tolerances.
This is especially important for custom LED displays and tightly designed assemblies.
A dimensional problem identified at incoming inspection may require a supplier discussion. The same problem discovered after thousands of PCBs have entered assembly can require rework, production downtime, or even board changes.
Review Documents and Lot Traceability
Physical testing is only part of incoming quality control for LED components.
Depending on the project, buyers may also need documentation such as:
- supplier inspection reports;
- certificate of analysis where applicable;
- RoHS documentation;
- REACH-related documentation where required;
- reliability test records;
- aging test data;
- material declarations;
- production lot information.
Not every order requires the full set.
The documentation should match the product risk, customer requirements, and purchasing agreement.
For recurring OEM production, lot traceability is especially useful. If a failure appears later, the buyer should be able to identify which production batch was involved rather than treating all previous shipments as suspect.
Define LED Acceptance Criteria Before Mass Production
The best time to agree on LED acceptance criteria is before the first production shipment arrives.
A simple framework may look like this:
| Inspection Item | Acceptance Reference |
|---|---|
| Part number | Purchase order |
| Dimensions | Approved drawing |
| Forward voltage | Approved specification |
| Wavelength | Agreed wavelength range |
| Optical output | Approved test range |
| Appearance | Agreed defect standard |
| Packaging | Purchase specification |
| Quantity | Purchase order |
| Traceability | Supplier lot information |
This makes acceptance decisions much easier.
It also reduces subjective disagreements such as “the brightness looks different” or “the dimensions are close enough.”
If something matters to production, it should ideally have an agreed reference or measurable limit.
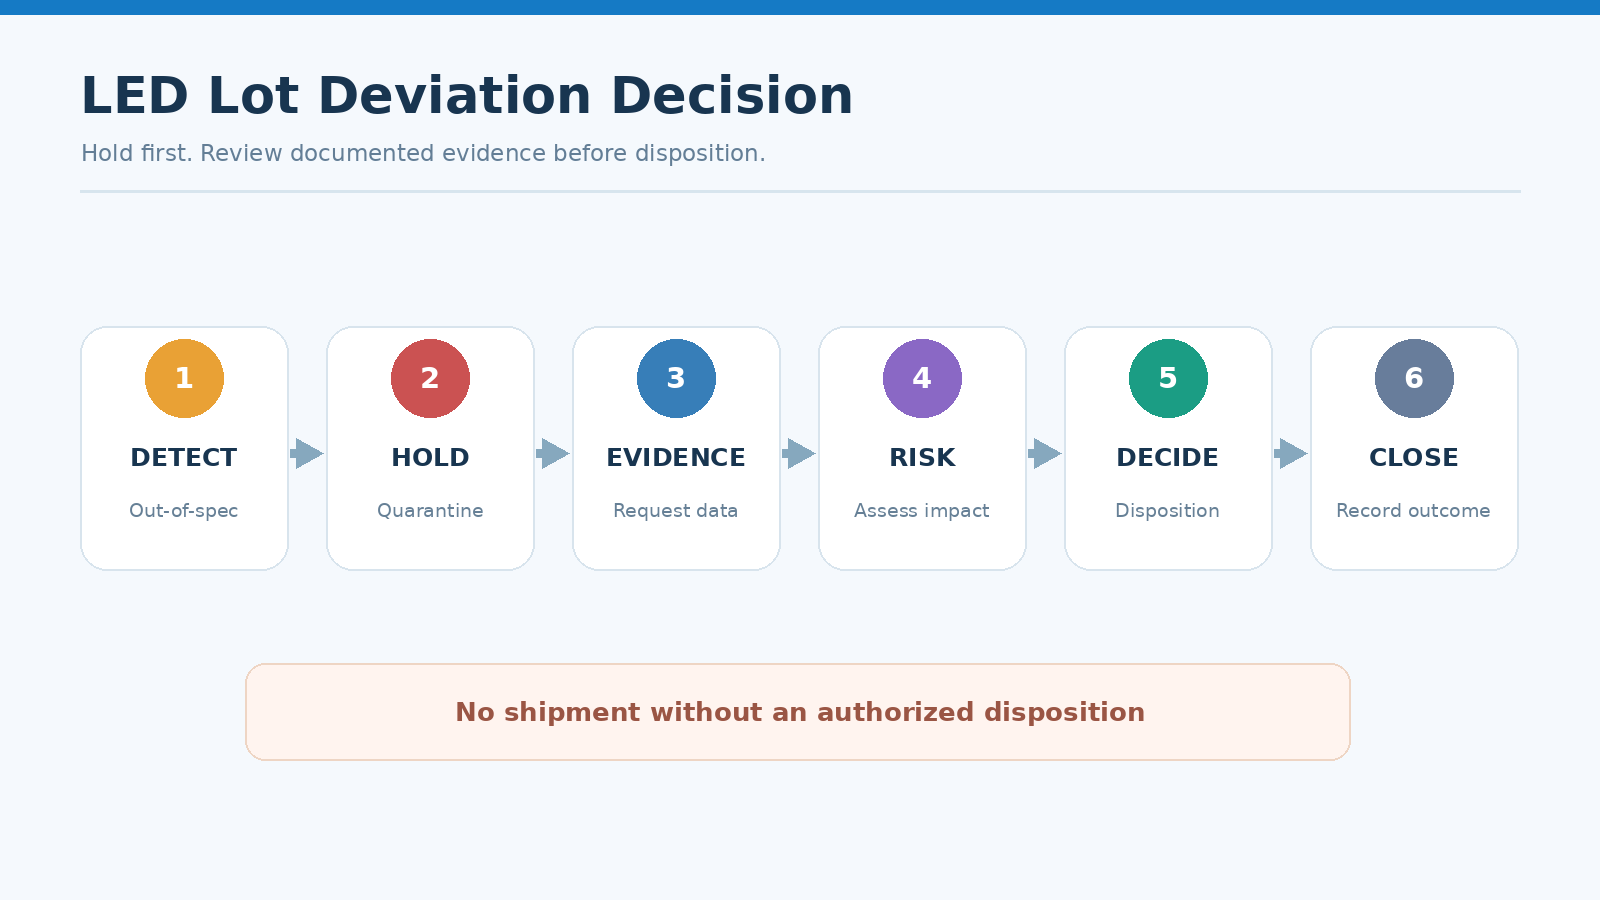
When Should a Batch Be Held or Rejected?
Typical reasons for holding a lot for investigation may include:
- incorrect part number;
- wavelength outside the approved range;
- Vf or another electrical parameter outside specification;
- significant brightness inconsistency;
- mixed lots without prior approval;
- package or reel damage;
- incorrect polarity;
- dimensional nonconformance;
- missing traceability;
- defects above the agreed sampling limit.
Not every issue automatically requires rejecting the entire shipment.
Depending on the problem, the response may be:
- 100% sorting;
- additional sampling;
- replacement of affected quantities;
- supplier rework;
- full lot rejection.
The decision should follow the agreed quality requirements rather than being made case by case without a reference.
What to Do When Incoming Inspection Finds a Problem
Do not release suspect LEDs into normal stock while the issue is being investigated.
A practical sequence is:
Quarantine → Document → Verify → Notify → Correct
Record the lot number, affected quantity, sample size, measurements, photographs, and the specification that was not met.
Where possible, repeat the test to rule out equipment or setup errors.
For significant or repeated problems, the supplier may need to provide:
- root-cause analysis;
- replacement components;
- sorting support;
- corrective action;
- an 8D report;
- CAPA documentation where appropriate.
Good inspection records make supplier quality discussions much faster because both sides are working from measurable evidence.
LED Incoming Inspection Checklist
Before releasing an LED batch to production, confirm:
| Check | What to Verify |
|---|---|
| Product identity | Correct part number and quantity |
| Lot information | Batch and date code |
| Packaging | ESD, moisture, and shipping condition |
| Appearance | Package, lens, leads, and markings |
| Electrical | Vf, polarity, leakage if required |
| Optical | Brightness, wavelength, or radiant output |
| Dimensions | Drawing and PCB compatibility |
| Sampling | Agreed AQL or inspection plan |
| Documentation | Required quality/compliance records |
| Traceability | Supplier production lot |
Frequently Asked Questions
What should be checked during LED incoming inspection?
The basic checks are product identity, packaging, appearance, electrical parameters, optical performance, dimensions, and lot traceability. The exact inspection plan should match the type of LED and the risk of the application.
Does every LED in a shipment need to be tested?
Usually not. Many OEM buyers use a sampling plan based on batch size, application risk, supplier history, and agreed acceptance criteria. Higher-risk applications may justify tighter inspection or additional testing.
What does AQL mean in LED inspection?
AQL is a sampling approach used to help determine the number of units inspected and the allowable number of defects within that sample. The appropriate level should be agreed according to the product and quality requirements.
How should UV and IR LEDs be inspected?
Do not rely only on checking whether they turn on. Depending on the application, wavelength, radiant output, forward voltage, and output consistency may need to be measured.
What is a golden sample?
A golden sample is an approved physical sample kept as a production and inspection reference. It is particularly useful for custom LED displays and products where appearance, brightness, color, or package details are difficult to describe using specifications alone.
Good Incoming Inspection Starts Before the LEDs Arrive
Incoming inspection works best when the buyer and supplier have already agreed on what “acceptable” means.
Before mass production, both sides should be clear about the part specification, drawing, test conditions, optical range, sampling method, defect classification, traceability, and required documents.
Once those points are fixed, incoming inspection becomes much more than a final quality check. It protects the assembly line from the wrong components, makes batch decisions more objective, and gives both buyer and supplier a clear reference when a problem occurs.
For OEM projects involving custom LED displays, UV LEDs, IR LEDs, and other LED components, HOUKEM can support specification confirmation, sample approval, inspection requirements, and batch traceability before volume production. This is particularly useful when electrical, optical, dimensional, and appearance requirements all need to remain consistent from the approved sample through repeat orders.
LED RFQ Checklist: What Information Should Buyers Include?
LED Display MOQ, Pricing and Custom Options Explained